Creating a Form or Learning Plan in Hour Republic

Below are steps for creating a form or learning plan. These steps apply to all forms.

#1: Click on the Forms tab in Hour Republic to create a new form

#2: Click the Create Forms button in the top right corner
[this is an option if you prefer to select your students first]

or

Select one or more form(s) that you wish to create (e.g. check off Learning Plan, WEA and OYAP)
[this is an option if you prefer to select your forms first]

#3: Click Create Forms (if you haven’t already)

#4: Select one or all of the students that you would like to create a form(s) for, then click Next.

TIP: You can create multiple forms for multiple students at the same time.

#5: Begin filling out or editing the form for your student(s)
We autofill your form with student data that was imported (shared by your school board's IT department)


#6: Most forms will have the option to Add Course Details and/or Add Employer Details.

Click the Add button to view and select from a list of all the Ministry of Education courses. Click the Add button again to add multiple courses for a student.

#7: Add the Employer information

There are 2 ways to add an employer. You can either search for an existing employer or add a new employer. Before adding a new employer, please ensure that you have searched for your employer first, in order to avoid duplicates.

Why isn't My Student's Employer Showing Up?
The search bar only shows employers that have the Active status. Any employer created by a teacher is automatically set to this status, however, any employer created by a student is set to Pending.
Add an Existing Employer
The search bar is smart. If you type in a few letters, it will find a match. Once you have selected an employer, select the Contact and Student Position (i.e. Cashier).
Adding a New Employer
If you are unable to find an employer via a search, click the Add Employer button to create a new employer. You can follow this FAQ to add a new employer.

TIP: Remember that if you want to add or edit employer data to click Edit Employer to make auto filling easier for future forms. If you add the data under the Details section, it will not save to the Employer profile.

#8: Fill out the remainder of the form.

#9: Once the form is complete, you can either
– Save, Finish or Export PDF
– Print
– Sign electronically
– Email a request(s) for e-signatures (FAQ here)

Existing and Copying Forms

From the main forms tab (Recent Forms), you can view all recent forms. When you check off the box beside a form, you have the option to Edit, Copy, Export or Delete the form.

If you click the Copy option, a new student page will pop-up. Select a student(s) that you would like to copy the form(s) to. This will copy over the all of the form details from one student to another. Now, you can open up the copied forms and edit them as needed.

How do I add expectations to learning plans?

Select the student learning plan and scroll to the bottom of the learning plan.

1. Click the Choose Expectations button  (under Course Expectations or Employer Expectations groups at the bottom of your plan)

2. From the pop-up menu, select the relevant tab (e.g. Curriculum) and “Choose” from the drop-down:

(i) Course Expectations
– All Curriculum
– Overall Course Favourites

(ii) Employer Expectations
– Occupations (NOC)
– Trades

3. Select the relevant expectation(s) by clicking on the expectation (e.g. A1.2 in the screenshot below)

When you click on an expectation, it will be included in the learning plan and a check mark will appear under the Selected column to indicate this (outlined in green above).

Once you are done selecting expectations, click the Done button and you will see the expectation included.

4. Save the learning plan or Save and Export

RELATED QUESTIONS

What if my expectation is not listed?

(i) You can insert your own expectation by clicking


How do I copy or re-use an existing form or learning plan?

Copying forms or learning plans allows you to use pre-existing forms rather than creating each form or learning plan from scratch.

We recommend starting with one student and using that student as the model student for OYAP and WEA forms for instance (e.g. for the WEA, copying fields like insurance coverage, placement dates, and schedule from one student to another). For learning plans, the copy feature allows you to copy learning goals, course expectations, employer expectations, etc. from one student to another.

*You can use the copy feature even if a student has a completely different employer and/or course.

#1: Click on the Forms tab in Hour Republic

#2: Click a form that you would like to use then click the Copy button

#3: A separate page will pop-up and allow you to select all the students you would like to copy the form for

#4: Click Copy Forms

NOTES:
  • The form will auto-fill with relevant student information and all other field will copy over (e.g. Placement Start and End Dates).
  • If you are creating an OYAP form, you will need to check off the Registrant box at the top of the form in order to auto-fill sections one (Participant) and two (Registrant) of the form.

Exporting and printing forms and learning plans

In terms of exporting and printing documents, a teacher can:

  • Export and print individual forms for one student (e.g. one WEA, one learning plan);
  • Export and print all forms for a particular student (e.g. a student’s WEA, OYAP, and SCELP);
  • Export and print more than one form or learning plan for their class (e.g. all OYAP forms).

Once exported, the forms are collated into one PDF document, then teachers can print the document.

Export and print forms for one student
(e.g. one WEA, one SCELP)

There are several options to export individual forms and learning plans:

1. When a form or learning plan document is open, click Save and Export (either at the top or bottom of the form)

2. In the main Form section, under Recent Forms, select all or a specific form and type the students name in the search bar. Select one or all the recent forms you want, then click Export Forms

Export and print the same form (e.g. WEA) for multiple students

  1.  In the main Form section, under Recent Forms, select all or a specific form and select all the students you want included, then click Export Forms

Document e-signatures: How do form recipients (students, employers parents/guardians) provide e-signatures?

Teachers can send Employers, Parent/Guardians and Students (the “signee”) email requests to sign documents electronically.

#1. The signee will receive an email requesting an e-signature. The message will include the student’s name and the name of the document.

#2. The signee will click the Review & Sign button in the email message.

#3. A separate tab will open where the signee can review the entire form, e-sign and include their First Name, Last Name, and Email address. The signee will also agree to the terms for e-signatures.

#4. Once the form has been signed, the signee has the option to either download  a PDF version of the form or print  a copy of the form.

TIP: The signee can return to Review a form several times. Each time, if any new updates have been made to the form (e.g. by a teacher), those changes will appear. The signee can download or print the form multiple times.

How do teachers add and send e-signature requests?

Most forms have an e-signature option in Hour Republic. Once a form has been created, you will notice signature fields at the bottom of the form as follows:

1. Click on the ‘Tap or click to sign” line

2. A pop-up window will appear where a signature can be added


*Ask the signatory to add their signature to the line, and to enter their First Name, Last Name and Email address

NOTE:

The signature can be added to any touch screen with a finger or stylus; a signature can also be added via any computer with a computer mouse

3. Click Sign

Once a signature is confirmed, the signature will appear on the web form as follows:

4. Click Save in order to save the signature, or Save and Export the form in order to export the signature to a PDF form. Print the PDF form or save the form electronically when you are ready!

My Signature

You will notice an Insert My Signature checkbox. Teachers can save their signatures to make signing forms quicker

1. Check off the Save as my signature box to save your signature for future forms

2. Now, when you sign a form, you can click the  button to instantly sign.

Email Requests for E-Signatures

Teachers can send Employers, Parent/Guardians and Students email requests to sign forms and plans electronically.

  1. Click on the  tab
  2. Complete a form/plan and scroll to the bottom
  3. The Employers, Parent/Guardians and Students emails are auto filled
  4. Click the Send Email button
  5. Confirm the email address and add an optional message before clicking Send.
  6. You will be prompted to confirm submission details before sending the email request.

How do I add contacts to an Organization/Employer?

1. To add a new contact to an Organization/Employer, click the  button on the left toolbar

2. Click on the desired Organization/Employer’s name such as Canadian Tire, Best Buy, etc.

3. Select the Contacts button in the left toolbar under the icon

4. Click the button to add new supervisors to an Organization/Employer

5. A drop down will appear and you can begin to fill out all of the contact information

6. Once you have filled out the fields, click to finish creating the contact

How do I add new Organizations/Employers?

KEY INFORMATION

When adding a new Organization/Employer to Hour Republic, it is important that you fill in the following information. This information will show up for students when they track hours.

1. Organization/Employer name (eg. Best Buy, Walmart)
2. Contact name (i.e. Name of supervisor; make sure to include their email address)
3. Position name (i.e. the position of the student at placement such as Cashier or Kitchen Assistant)

LETS BEGIN ADDING AN EMPLOYER

1. To add a new Organization/Employer, click the  button on the left toolbar

2. Select theicon in the top right corner

GENERAL

1. Fill out the general fields including: Organization/Employer, sector, a description, website link, and School Board/Institution

2. Choose to add a start and end date the Organization/Employer is available

LOGO

1. Click the logo tab to add an image for the Organization/Employer

ADDRESS

1. Select the Address tab and fill out the following fields to generate a location

2. Once you have filled out the address, it will mark the location on a map

3. You can click ‘Remove Address’ to detach the location from the organization/employer or select ‘Add Address’ to create a new one

CONTACTS

1. Click the Contacts tab to add new supervisors to an Organization/Employer

2. Along the top of the Organization/Employer page you will find 3 icons
– Use this icon to add notes private/shared notes
–   Add attachments such as PDF, pictures, word documents
–   Create new positions by clicking the icon

POSITION

1. On the Positions page, click theicon to create a new position, or select  to generate a pre-existing position

2. Fill out the following fields to create a position

  • General
    – Position Name
    – Type (Placement or Volunteer)
    – Date Range
    – Contact person
    – Address
    – Description (i.e Tasks and Activities)
    – Publication Dates
    – Mark the opportunity Published to keep private, or Published for all students to view
  • Expectations
  • Goal & Benefits
  • Qualifications & Training
  • Scheduling
    – Add the time commitment
    – Duration (i.e. September-February or 3 months)
    – Daily timeslots for the position
  • Demographics (Age, Gender, etc..)
  • Required Skills
  • Developed Skills (Which skills are developed in this opportunity?)
  • Once all the skills are filled out, click  to see how students view the position/opportunity

How do I clear my cache in Chrome, Firefox and Microsoft Edge?

To speed things up and conserve communications bandwidth, browsers (e.g. Chrome, Firefox) attempt to keep local copies of pages, images, and other content you’ve visited, so that it does not need to be downloaded again later. Occasionally this caching scheme goes awry (e.g. the browser insists on showing out-of-date content) making it necessary to bypass the cache and force your browser to re-download a web page’s complete, up-to-date content.

➡️ Before proceeding with the steps below in your Settings, try pressing Ctrl+F5 to clear the cache on your page. Or, some browsers such as Chrome will automatically clear cache when the browser is closed (i.e. close all tabs & windows, then re-open Chrome). This could be all that is necessary to clear your browser's cache. If not, please review the other options below.

In Chrome

On your keyboard, press the Ctrl button and F5 key at the same time

or,

  1. On your computer, open Chrome.
  2. At the top right, click More More.
  3. Click More tools and then Clear browsing data.
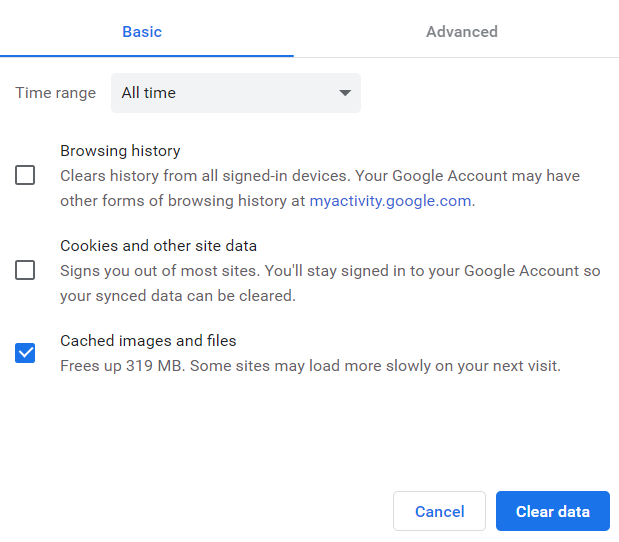
  4. At the top, choose a time range. To delete everything, select All time.
  5. Next to “Cached images and files,” check the box.
  6. Click Clear data.
  7. Close Chrome completely (all tabs), and re-open Chrome again to notice the effects of clearing your cache.

NOTE: There is no need to check off the Cookies and Browsing History boxes when clearing our cache. That could remove saved content and passwords from your computer.

Reference: Google Account Help; Wikipedia

In Firefox

1. On your computer, open Firefox

2. Click on the  icon in the top right corner

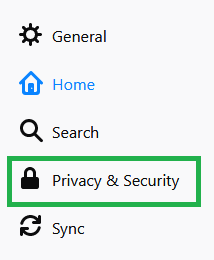
3. Next, Select the Privacy & Security settings on the left side of the screen

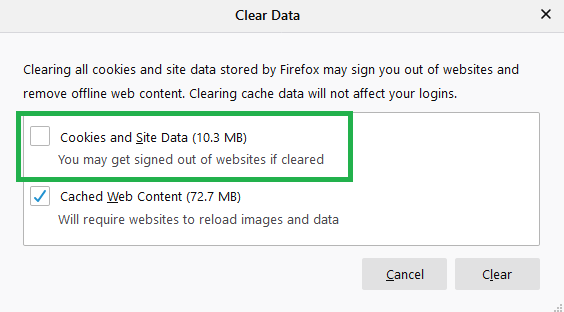
4. Scroll down until you find the Cookies and Site Data then click on Clear Data

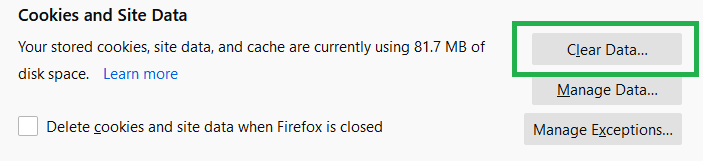
5. A menu will pop up with 2 options, make sure to uncheck the Cookies and Site Data option or else your saved login information will be deleted.

6. Select  then exit your settings, any changes you make are automatically saved

Reference: Support Mozilla

In Microsoft Edge

1. On your computer, open Microsoft Edge
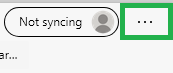
2. Click on the  icon in the top right corner

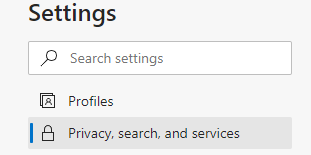
3. Next, Select the Privacy, search, and services settings on the left side of the screen

4. Under Clear browsing data, select the  button

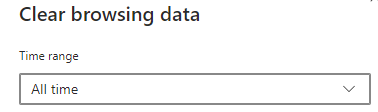
5. Set the Time Range to the desired setting

6. A pop-up menu will appear, uncheck Browsing history, Download history, and Cookies and other site data. Make sure Cached images and files is checked.

7. Click on the  button then exit your settings

Reference: Lifewire

Tips for Searching Employers

Before adding a new employer, please ensure that you have searched the employer database first.

The search bar is smart. If you type in a few letters, it will find a match. It is better to type in a few letters than the entire name of an employer just in case it is spelled differently.

If you type in “Tim”, then anything with “Tim” will come up. If you type in “Hor”, then all of the Tim Hortons stores will come up. But if you type in “Horton’s” into the search bar, our system will not recognize the apostrophe if the employer is not spelled that way.

For instance, we want to avoid this: “Community Living X County” spelled 3 different ways:

Community Living X County
Community Living- X
X County Association for Community Living

Other tips to consider:

Sometimes a company will have “and” in their name, or use “&” instead:
Tool & Mould, versus Tool and Mould

Sometimes a word is spelled incorrectly:
“Day care” versus “Daycare”

Sometimes there is an apostrophe, and sometimes not:
Gilligan’s Restaurant vs Gilligans Restaurant

Please keep this in mind when searching for employers and before adding a new one. We want to avoid adding duplicates to the system.