Forms FAQ Guide

Need some help navigating our Form software? You’ve come to the right place.

General
•    How do I access the Forms (document generation) software?

•    What are student tags used for?
•    How do teachers update their phone number?

Employer/Organization
•   How do Employers and Parents/Guardians provide e-signatures?
•   How do I create employer specific expectations for the SCELP form?
•   Tips for Searching Employers 
•   How do I add contacts to an employer profile?
•   How do I add an employer or edit an existing employer?
•   How do I add positions to an employer profile?
•   How do I add employer expectations?


Webinar Schedule

We host live webinars where we walk you through our software (from start to finish), and answer any questions that you may have.

Co-op Hour & Activity Tracking
Tuesdays @ 12:00pm
Wednesdays @ 10:00am

Form & Learning Plan Generator
Wednesdays @ 12:30pm
Thursdays @ 1:00pm

Volunteer Hour & Activity Tracking
Thursdays @ 11:30am

*All times are in EST.

If you are interested in attending, then email us at info[at]charityrepublic.com with the time slot(s) that you are available. Then, we will happily share the webinar details with you.

Hour Republic FAQs Guide

Look no further than this guide to direct you to the FAQ you need

General
•    Getting Started Guide
•    How do Teachers/Coordinators sign-up via hourrepublic.com? (or, Google sign up)
•    How do I reset my password and find my username?
•    General Questions
•    How do I send a message to an individual, group, or a class?
•    Pre-placement Activities
•   How do I Locate Unapproved Hours?

Main Administrator Section
•    How do I create a new class and signup code? 
•    How do I add a new resource?
•    How do I add Bulk Achievements?
•    Adjusting the progress bar
•    Disable/hide certain sections and fields
•    How do I add or change my school’s logo?
•    Student Types
•    How do teachers/coordinators customize the Achievements drop-down?
•    A Student is Missing from my Class (Hour Tracking)
•    Why can’t I see students on my Students section?

Employer/Organization
•    How do I add new Organizations/Employers?  
•    How do I add contacts to an Organization/Employer?  
•    How do I add a Volunteer or Placement opportunity?
•    How do Organizations Approve Hours?
•    Published and Public Positions/Opportunities
•    Active vs Pending Organizations/Employers
•    Why isn’t an organization receiving my email to verify hours?
•    How do I add employer expectations?

Students
•   
How do students sign-up via hourrepublic.com? (or, Google sign up)
•    How do I add Volunteer and Other Hours?
•    How do I add Placement/Co-op Hours?
•    How do I print a report of my hours?
•    How do I manage my Student Dashboard?
•    Icon Guide
•    How do I Assign an Organization to a Student?
•    How do I see when students registered or logged in last?
•    How does a Student Add More than One Shift?
•    What if a Student has Two Employers/Supervisors?
•    How do Students and Teachers/Coordinators Create an Achievement?
•    How do I Track Overnight Shifts?

Reflections/Journals
•    How do teachers add new Reflection/Journal topics? 
•    How do students submit a Reflection/Journal?
•    How do teachers mark Reflections/Journal topics?
•    How do students delete a Reflection/Journal?

Reports
•    How do I generate a report? 
•    How do I generate a PDF version of reports?
•    How do I print a report of my hours?

Calendar
•    Colour Coding in the Schedule
•    Navigating the Calendar
•    How do I create a PDF Version of the Calendar?

Updating the Semester or Teacher associated with forms

All forms are assigned to a Semester and a Teacher. In order to assign forms to a different Semester or Teacher, follow these steps:

(i) Selectan already created form

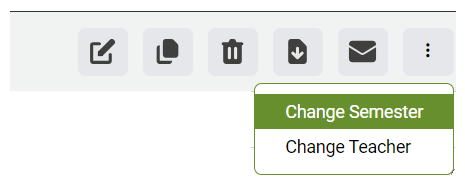
(ii) Click the 3-dot menu  that appears at the top of the screen

​(iii) Select the Change Semester or Change Teacher option from the drop-down

(iv) Once selected, a pop-up window will appear. Select the desired option from the drop-down menu (i.e. a different Semester or Teacher).

(v) Click Save to complete the process.

All selected forms will be switched over to a different Teacher or Semester now.

​​

How do students add e-signatures to forms & to their account settings?

You can save time and paper by having employers, parents/guardians, and teachers/coordinators sign your documents through e-signatures. Please follow these steps to learn more:

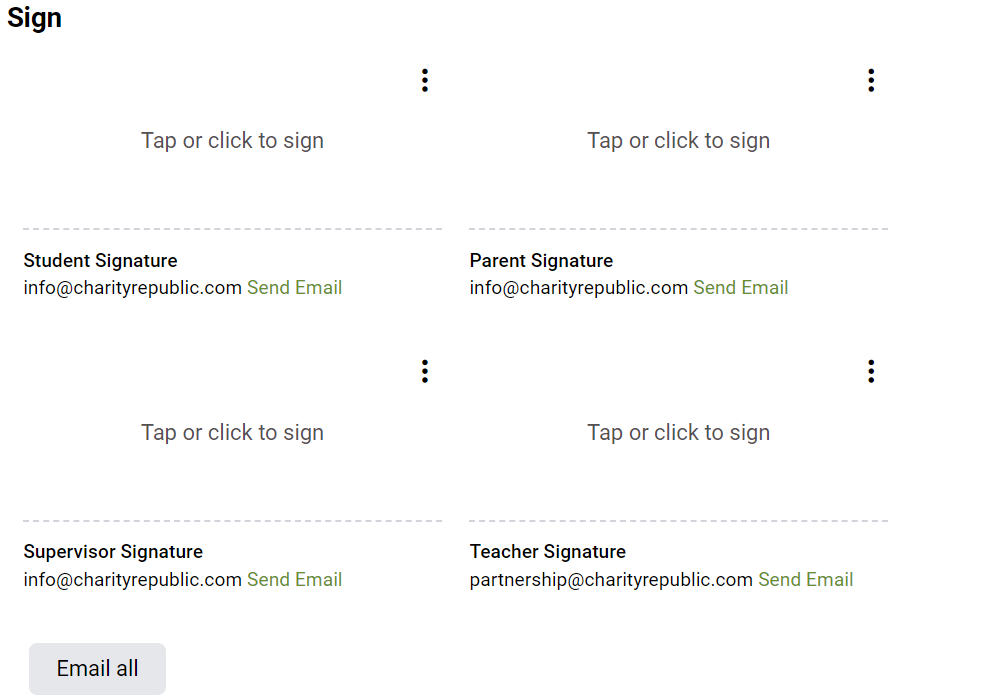
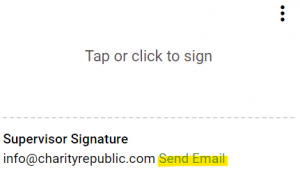
Once a form has been created for you (see FAQ), you will notice signature fields at the bottom of the form as follows:

1. Click on a desired signature line

2. A pop-up window will appear where a signature can be added.

3. Ask the signatory to add their signature to the line, and to enter their First name, Last name and Email address

NOTE: The signature can be added to any touch screen with a finger or stylus; a signature can also be added via any computer with a computer mouse

4. Click

5. After signing the form, the following screen will appear:


6. Click

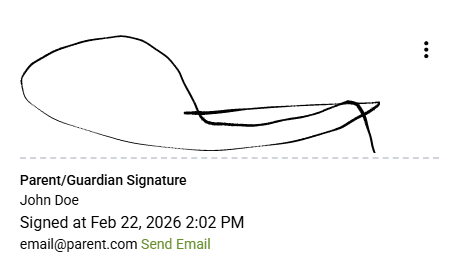
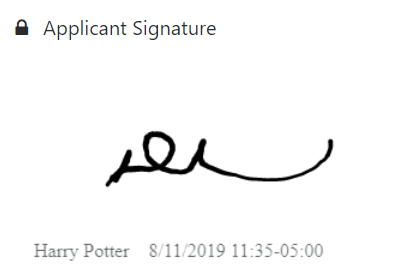
Once a signature is confirmed, the signature will appear on the web form as follows:

6. Click  in order to save the signature, or  the form in order to export the signature to a PDF form. Print the PDF form or save the form electronically when you are ready!

My Signature

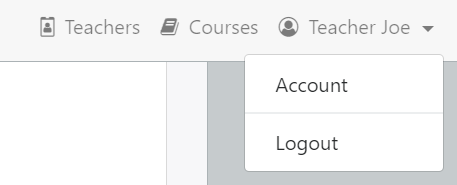
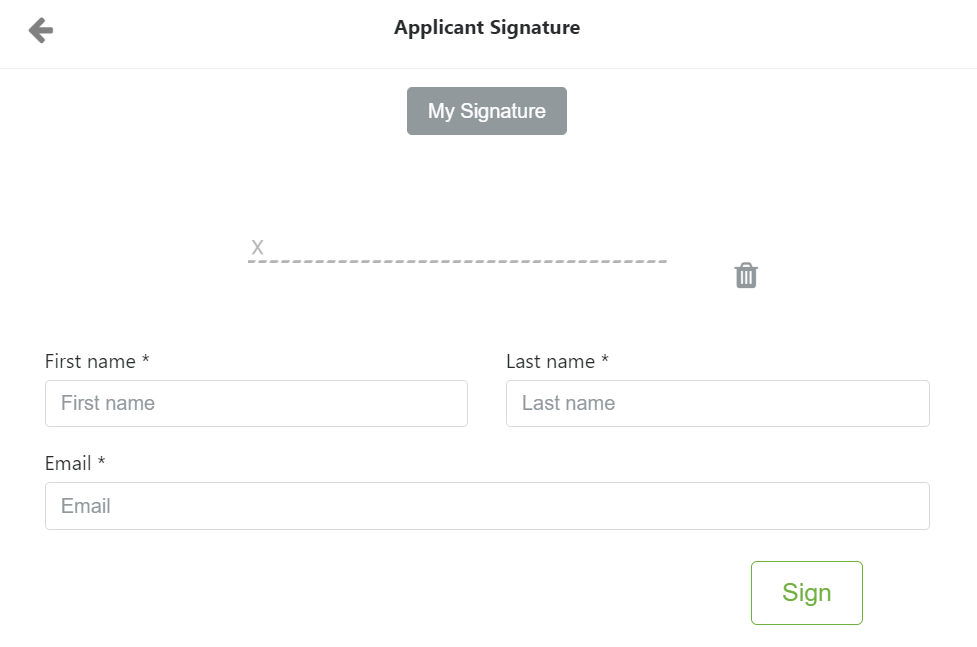
You will notice a My Signature button. Teachers can save their signatures to their Account settings in the form software (see image below). Follow steps 1 to 5 in order to add a signature to your Account settings.

After you save a signature to your account settings, this signature can be added to any form by clicking the My Signature button.


1. Click on the signature line under your Account settings.

2. A pop-up window will appear where a signature can be added

  • Add a signature using your finger (for touch screens) or a computer mouse, and enter your First name, Last name and Email address


3. Click Sign

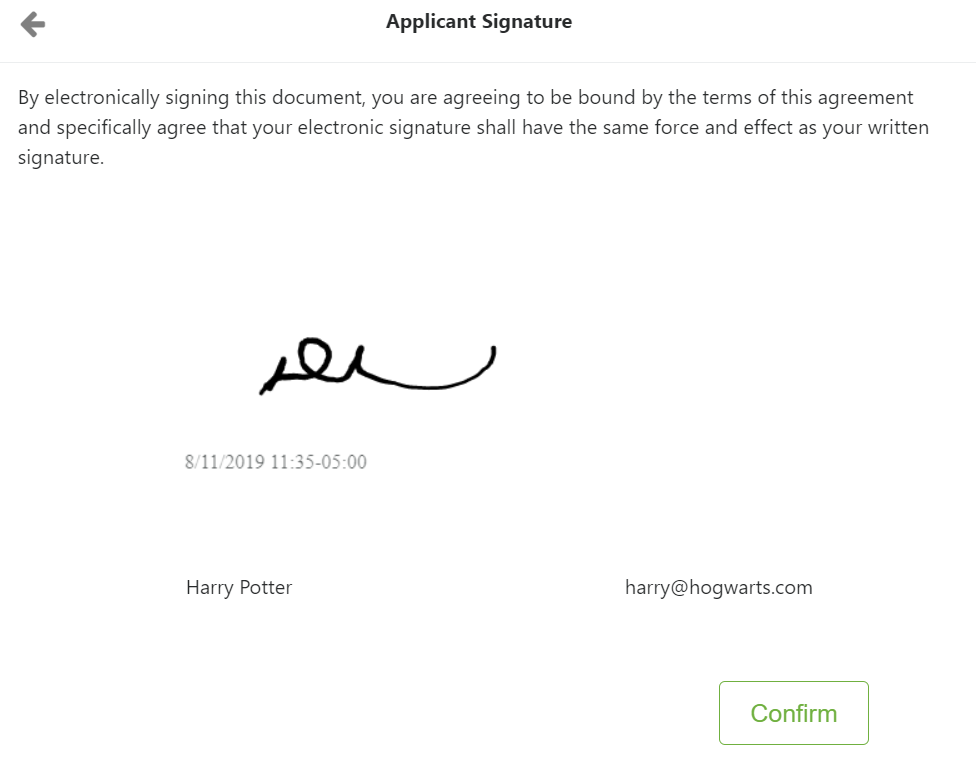
4. After signing the form, the following screen will appear:


5. Click Confirm

Once a signature is confirmed, the signature will appear on the account as follows:

6. Click Save to complete the process.

How do Organizations/Employers & Parents/Guardians Approve Hours?

Organizations/Employers & Parents/Guardians can approve or decline student hours via email by following these simple steps:

#1. Organizations/Employers & Parents/Guardians will receive an email message regarding student hours

#2. Click the   button in the email

#3. Review the information the student shared, and click  or 

That’s all! You’re done 🙂

For more information regarding the process, please see details below:

1. When a student submits their hours for approval, the organization/employer will receive an email from Hour Republic.

  • The email comes from Hour Republic (noreply@hourrepublic.com)
  • The subject of the email is: Please verify hours for [name of student]
  • Placement (co-op) hours are typically submitted weekly

2. Open the email, scroll to the bottom, then click on  to approve or decline the hours

3. You will be taken to a screen where you will have a chance to review the hours and submit a comment (optional)

4. Once you are finished reviewing the hours, you may select  or

5. A verification message will appear as follows:
Thank you. The status of these hours has been updated. Have a great day!

TIPS

If the student has sent out hours for approval and the organization has not received the email, then here a couple of possible reasons why:

1. The email may have been sent to your Spam folder.

2. The student may have input the email address incorrectly; double check with the student to ensure the email address is accurate.

Why isn’t an organization/employer or parent/guardian receiving my email for the verification of hours?

Here is a more detailed FAQ on a similar topic.

Are organizations/employers and parents/guardians required to create an account?

No, employers and parent/guardians are not required to create an account.

Students have an account where they add hours and you will receive an email that summarizes those hours and you can accept or decline the student’s hours with the option to leave a comment.

Click here to view the organization/employer fact sheet, which teachers can share with any supervisors. (Click here for the French version).

Mass e-signature requests

How do I send an e-signature request to more than one person & for more than one form at the same time?


#1. Select one or more form(s)

➡️ Teachers can select different forms & multiple students. 

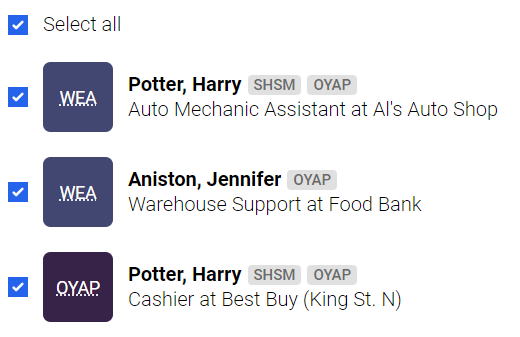
Example of selecting more than one student and form type (e.g. WEA and OYAP forms):

#2. Select the mass email icon at the top of your screen 

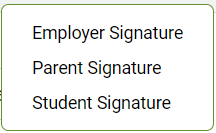
#3. Select the signature type from the drop-down

➡️Teachers might not see certain signature types (e.g. parent/guardian signature) because the selected form does not have that signature type.
e.g. If a form does not have a Parent/guardian e-signature, then Parent/Guardian Signature will not show up as an option in the drop-down.

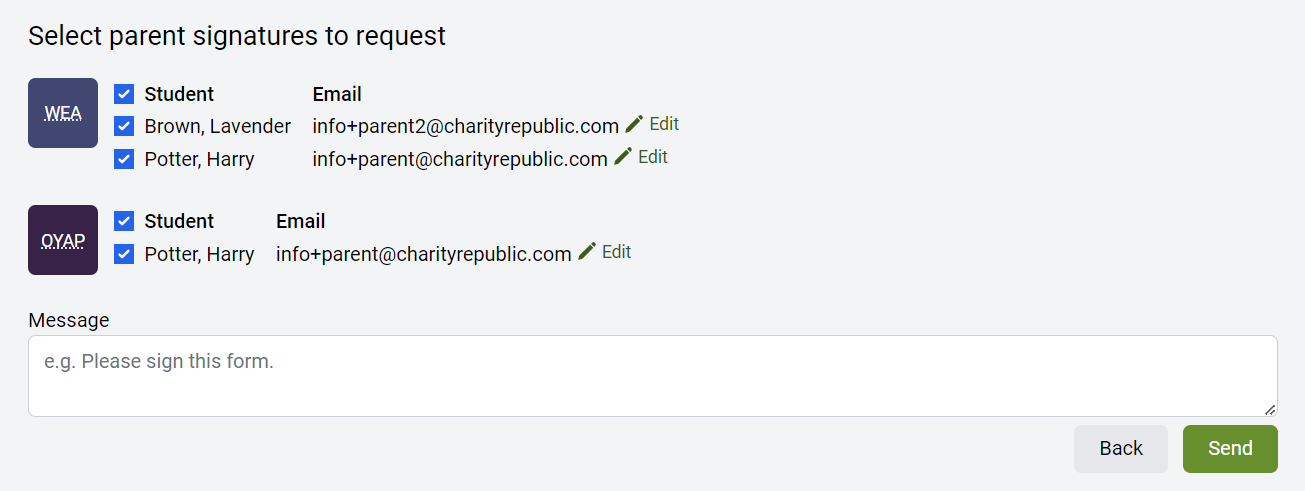
#4. Make your selection: select student(s) by form type and click

➡️
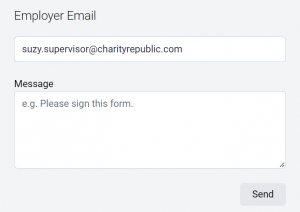
 Teachers have the option to add a message. This message will apply to all selected students and forms.

➡️ You will be asked to confirm your selection one more time (Are you sure you want to send these signature requests?). Click Send again.

Can I send an e-signature request for more than one form?

Yes.

Can I send an e-signature request for more than one student?

Yes.

Can I send an e-signature request to more than one employer? More than one parent/guardian?

Yes.

Can I send an e-signature request to employers & parents/guardians at the same time?

No, not for mass e-signature requests. Teachers can only pick one signature type at a time (e.g. employer e-signature request). Teachers can send multiple parent/guardians e-signature requests (for multiple students) at the same time; the same is true for employer e-signature requests.

➡️ However, within an individual form, teachers can send e-signature requests to the parent/guardians, employer and student at the same time (FAQ).

Are the requests for each form combined into one email or sent separately?

When using the mass e-signature feature, e-signature requests for multiple forms are combined into one email.

For example, if teachers send an employer a request to sign 2 different forms, then both forms will appear in one email.

How do teachers know if an e-signature request has been sent?

A Request Already Sent section will appear:

Why do I need to select a section for certain forms?

If more than one of the same signature type exists on a form, then those signature requests must be sent separately (i.e. 2 different parent/guardian signatures on the same form).

I selected a student’s form but the Parent/Employer Signature request does not show up.

It’s possible that the form has already been signed. If that’s the case, then the request to sign will no longer appear. For example, if a parent/guardian e-signature request is selected but the parent has already signed the form, then the request to sign will no longer appear.

 >  

What if an email address is missing?

If an email address is missing, then teachers have the option to Edit and add an email address.

  • For parents/guardians, the email address pulls from the form or the Contact section.
  • For employers, the email address pulls from the selected employer in the form.

Tags for Students

Tags are used to easily identify SHSM and OYAP students in Hour Republic.

How do I add a tag?

Option #1. The Tag section can be accessed under a student’s profile: 
Simply check off the desired tag(s), and Save.

Option #2. Tags are automatically set when a new OYAP and/or SHSM form is created, or when an OYAP or SHSM form is modified and saved.

Option #3. If your IT department has indicated that a student is an OYAP or SHSM student (in the file that is shared with us), then tags are automatically set for a student.

NOTE: Option #2 and #3 are 'going forward' features. These tags will only appear for recently created forms or recently imported students because this feature did not exist previously.

Appearance of tags

(i) Tags appear at the top of a student’s profile: 

(ii) Tags appear when selecting students to create a new form: 

(iii) Tags appear for already created forms:

Imported tag 

You may notice an Imported tag when you are selecting students to create new forms. This means that your IT department provided us with student data and this data was imported. If an Imported tag does not appear, then the student simply registered an account and was not imported.

NOTE: This is a 'going forward' feature. The Imported tag will only appear for recently imported students because this feature did not exist previously.

How to Locate Volunteer & Placement Opportunities

Click on the Opportunities section  in the left panel or,
locate opportunities from your Dashboard.

In the Opportunities section, you can view placement opportunities by Organization, Position, Location, and Sector. If a placement has an address set, then it will appear on the map as well.

Examples of opportunities:

Click on a specific placement to review any details associated with the placement – this includes the placement description, qualifications and contact information.

Registering for Hour Republic via Google (Teachers)

Please note that teacher accounts undergo an internal verification process before access is provided. For quicker access, please email             info[at]charityrepublic.com and notify our team when you have registered for a teacher account.

#1. Click here to start the teacher registration process.

#2. Click the Sign up with Google button

Only use the email address assigned to you by your school district or institution. Do not use your personal email address unless told otherwise.

➡️ You might also see Google in the top-right of your screen (depending on how Chrome is configured). If so, click the Continue button. 
#3. Select your Google account.
If your email account does not automatically appear, then select Use another account

#4. Enter your school-assigned Email address (or confirm that it is accurate), and click Next
#5. Enter the password associated with your Google account, and click Next, then Confirm
#6. Select your School District or Institution as well as your School or Program, and click Next

➡️ If the email domain that you tried registering with does not match, then you will see a message like this:

#7. Complete the registration form and click Next

Password Tips
– Passwords require a length of at least 8 characters
– 8 character passwords require at least one special character
– Passwords with 9 or more characters don’t need any special characters, capitals or numbers
– We recommend creating a password that consists of 2 random words (or more) followed by a 3 character number. For example: word-word-word#

Congratulations and welcome to Hour Republic! 😀

==========

Already have an account?
If you registered for an Hour Republic account previously, then you will be redirected to the Sign In page. Please login, or reset your password if necessary.