How do I send a message to an individual, group, or a class?

How to Message a Class

1. To begin, select the icon in the top right corner

2. Select the icon in the top right corner

3. Next, choose who you would like to message using the Recipients drop down

4. A pop up box will appear with a list of individuals at your school, at the top will be a series of filters, set all the filters to All, except the Class filter, set it to your class

NOTE:

  • if you do not have a class set up, please see this FAQ
  • You can also combine filters, for example, you can set all filters to All, except the Status filter and Class filter, set Status to active and the Class filter to your class and send a message at all active members in your class.

5. Once your class pops up, click the check box next to the Student column to select all of your students

6. Click 

7. Once the recipients have been chosen, fill out the subject, message, and if you would like, attach a file (Excel, image, PDF, etc.).

8. When you’re done, click 

9. Your class will receive an email notification regarding the message you just sent

NOTE: Please request your class to check their spam/junk folder if they cannot find the email just in case they have spam filters set up

How to Message an Individual/Group

1. To begin, select the icon in the top right corner

2. Select the icon in the top right corner

3. Next, choose who you would like to message using the Recipients drop down

4. A pop up box will appear with a list of individuals at your school, type in the first name OR last name of an individual you would like to send a message to

NOTE: If the individual does not show up, make sure all the filters are set to All

5. Click the checkbox next to their name then click 

6. Repeat Steps 4-5 until you have chosen everybody in the group

7. Once the recipient has been chosen, fill out the subject, message, and if you would like, attach a file (Excel, image, PDF, etc.).

8. Once you’re done, click 

9. The group will receive an email notification regarding the message you just sent

NOTE: If the individuals in the group do not receive the email, please request they check their spam/junk folder just in case they have spam filters set up


How do students delete a reflection?

In need of deleting one your reflections? Then follow these steps:

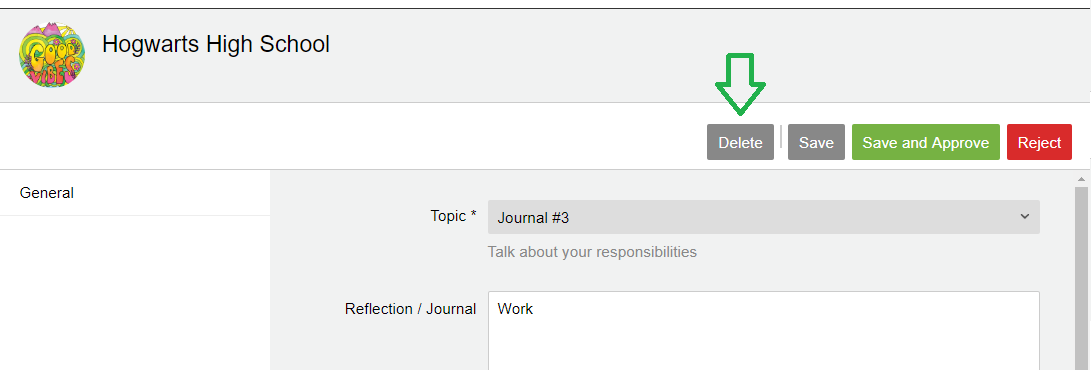
  1. Go to your Reflections / Journal Topics tab and click on the reflection you would like to delete

2. Next, click the Delete button

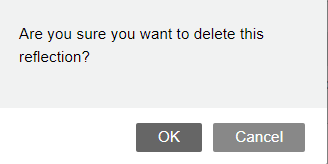
3. Once you click this, you will get a prompt to confirm your decision. Select OK to permanently delete your reflection

NOTE: These steps apply to deleting hours, achievements, notes, check-ins and attachments as well. For example, you can visit your Hours page, click on the hours you would like to delete, then select the Delete button to permanently remove them.


How do students add Volunteer and Other Hours?

Students can start to add hours by selecting the  icon on the left toolbar

1. To begin, they will select the button in the top right corner of the page

2. Students have the option to Label their hours (e.g. Week 1)

3. Under Category, they can choose from Volunteer, Placement / Co-op, Extracurricular, Peer Tutor, Training and/or Faith-Based hours (options vary by school)

4. Next, they will need to search for an Organization/Employer. If the employer is not present, they can add a new one by clicking the icon

5. Please have the students fill out the Organization Name, Supervisor Name, Email, Phone Number, and their Position (e.g. Warehouse Volunteer)

6. Students can add a Skill they learned and a Description of what they did during their work hours

7. For the Type of Hours field, students can either add hours as a Block (e.g. weekly, monthly etc..)
OR Shift, where they can add the specific date and time (i.e. September 9th, 9:00am-5:00pm).

8. Add your Parent/Guardian email.

9. Once the student has added and reviewed their hours, they can select button to save the hours as a draft, or submit to their Organization/Employer & Parents/Guardian.

How do students copy a log?

Students can create a copy of their hours by clicking  at the right side of the desired hours:

This will allow students to select Copy which creates an identical Draft of the hours.

If students have consistent hours each week (e.g. 9:00am to 12:00pm), then they  can add hours and save those hours as a template. They can leave the template in Draft status and copy that template each week.


Hour Status Definitions

Draft
A student has saved (Save button) the information but has not submitted (Save and Submit button) the log for verification.

Pending
A student has submitted (Save and Submit button) their log (to an employer for their placement; to a parent/guardian and organization) but it has not been verified or declined yet.

NOTE: Students and teachers/coordinators can re-send the hour log as a reminder to verify hours by clicking the Save and Submit button again. Teachers/coordinators can also Decline a log to turn it back into a Draft log to re-submit for verification.

Declined
Student hours were declined by the placement supervisor or by a teacher/coordinator. Possible reasons: the information submitted by the student was not accurate, there was not enough detail, and/or the student forgot to mention a task or project.

Verified
Student hours were verified by placement supervisor or by their teacher/coordinator (Save and Approve button).

How do students submit a Reflection/Journal?

Q: How Do I Submit a Reflection?

1. On the left toolbar, Click the  button

2. On the Reflection page, select  the  icon in the top right corner

3. Begin by selecting a topic from a list of Reflection topics available from your teacher/coordinator

4. Once you select a topic, the question and attachments added by your teacher/coordinator will appear

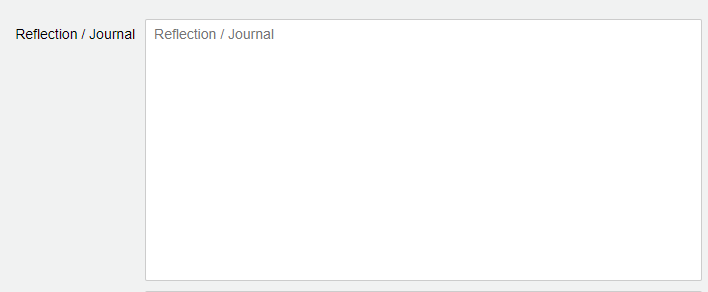
5. Use the Reflection/Journal box to answer the Reflection

6. Select to upload any documents, pictures or PDFs to your submission

7. Choose to Save and Approve or Save your response as draft.

Student Profiles

To begin managing students, click the  tab in the left toolbar

STUDENT LIST

1. Once students sign up, you will be able to view all your students on your dashboard. Teachers/coordinators are able to use the search bar and filters to sort how they see students

2. You can filter students by:

– Status (Active, Inactive, Pending)
– Semester
– Hour type (Extracurricular, Peer Tutor, Placement, Volunteer)
– Hour Status (Draft, Pending, Verified, Rejected)
– Classes (i.e. AM/PM classes, or streams)

3. Click any of the headers to sort the order of students (i.e. A-Z or Last Login)

4. Use the on the right side of the student row to email a student directly, or send them a password reset

STUDENT HOURS

1. Click anywhere along the student row to go to a specific student’s profile

2. On the student dashboard, teachers/coordinators are able to manage students individually

3. On the main dashboard, you can view the student’s progress bar, add hours for them, view their weekly logs and use the icons to manage the student’s profile.

STUDENT PROFILE

1. Click the  icon to manage a student profile

2. Under the General tab teachers/coordinators and students can edit/input basic information including:
– Name, Preferred Name, ID/OEN, School Board/Institution, School/Program, Parent/Guardian’s Email, Year Started, Email, Status, Semester, Sign Up Date, End Date, Associated Course, Username, Login Code

3. Click Profile Picture to upload a photo

4. Under the Demographics tab indicate the Student Type (i.e. Co-op, SHSM, Placement), Gender, DOB, Age Group, Keywords

5. Add Employers

6. Add Emergency Contact

7. Add Contacts

8. Add Addresses

9. Add Volunteer Interests

10. Add Career Interests

11. Add Classes

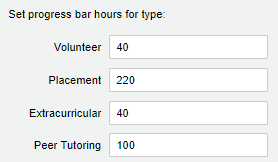
12. Add Settings (here is where you can set up the total number of hours for each progress bar)


Tip

Scroll down to the bottom of the General tab to see the username and email linked to the student’s account

ORGANIZATIONS/COMPANY

1. Click the  icon to manage student’s Employer/Company

2. To attach an Employer/Company to a student click thein the top right corner

3. Once you have chosen a Client from the drop-down, you can add the Start and End Date, Notes and Save.

TIP:

You must add Organizations/Employers first before assigning them to students. Click here for instructions.

AVAILABILITY

1. Click the  icon to manage a student’s Availability

2. Click thein the top right corner to begin

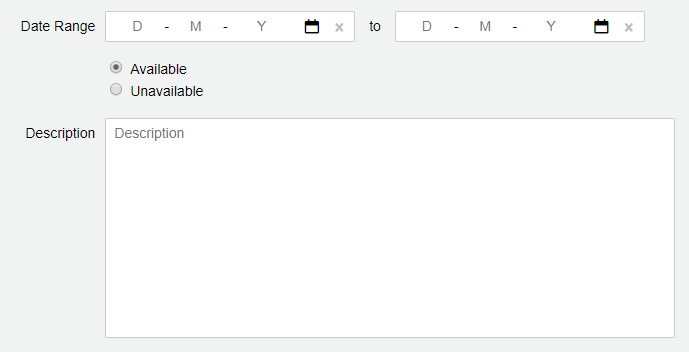
3. Under the General tab, add the Date Range of the student’s availability, mark whether the student is available during that date range, and add a description

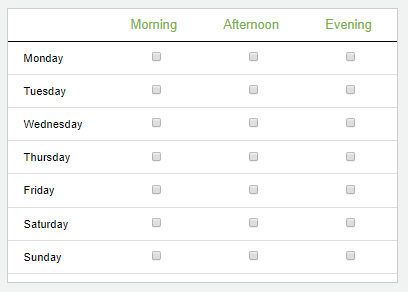
4. Under the Time Slots tab, a teacher/coordinator or student can mark which days and times the student is available then save


NOTES

  • Click the  icon to add or manage Notes for a student
  • Select the in the top right corner to begin
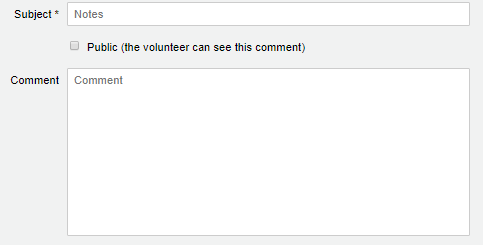
  • Add a subject line, check off the Public box if you would like the student to also see the comment, add a note and click Save

ATTACHMENTS

1. Click the icon to add attachments to a student’s profile

2. Select the in the top right corner to begin

3. Upload the image or document you would like to attach and add a description (optional)

4. Click Save

REFLECTION/JOURNAL TOPICS

1. Click the  icon to add a Reflection

2. Select the in the top right corner to begin

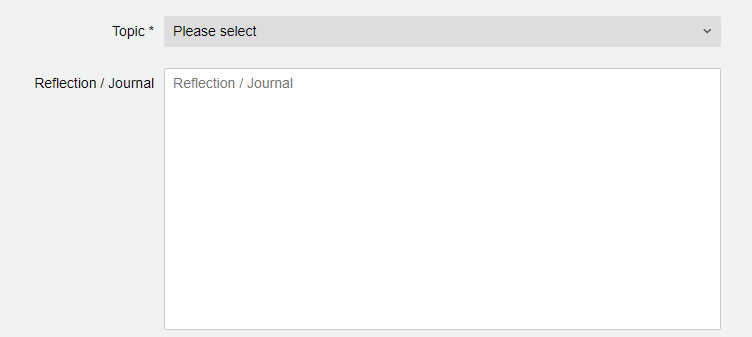
3. Pick a Topic and a question and any attachments relating to the topic will appear

4. Fill in the Reflection/Journal Field

5. Once finished, Save or Save and Submit the Reflection

For more details on how to add a Reflection, Click here

ACHIEVEMENTS

1. Click the icon to add an Achievement such as First Aid Training

2. Select the in the top right corner to begin

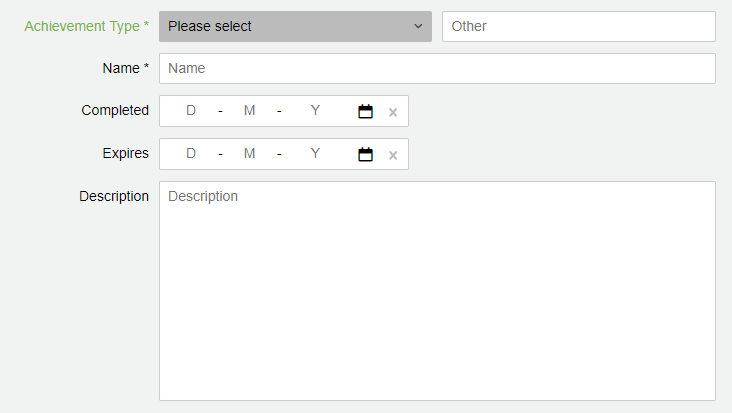
3. Under the General tab, select the Achievement Type from the drop-down [or teachers can create their own by clicking ]. Next, fill in the name of the achievement (e.g. Safety Training Workshop) or use the default selected, the completion date, expiry date, and/or a description of the achievement.

4. Next, fill in the information on the Issuer’s name, email, and phone

5. Lastly, add attachments relevant to the achievement

6. Once finished, click Save.

What is the Approved Check Mark on the Student’s Hour Section?

When a student’s hours are Verified by an employer, a teacher has the ability to ‘Approve’ the hours. This feature is available for both the Placement and Volunteer dashboards.

The purpose of this to serve as an indicator to the student that they are on the right track. The check mark also allows teachers to keep track of which logs they have reviewed to date.

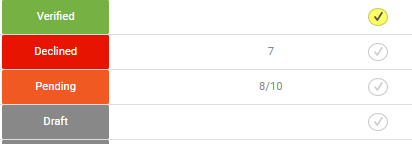
Under the Approved column, once you have clicked the Approved button, the checkmark will appear yellow indicating you have reviewed and approved these hours. Verified hours that are not approved and Non-Verified hours will appear as blank.

How do I decline and delete pending hours?

Declining Pending Hours

Pending hours can be declined by completing the following steps:

  1. Click on the  tab at the top of the page to show your hours and their related status
  2. Click on the Pending hours you wish to decline
  3. Once you’re on the Hours page, click the  button in the top right corner
  4. Click on this button to change your Pending hours into Declined hours

Deleting Hours

Hours can be deleted by completing the following steps:

  1. Click on the  tab at the top of the page to show your hours and their related status
  2. Click on the hours you wish to delete
  3. Once you’re on the Hours page, click the  button in the top right corner

NOTE: If you accidentally delete the wrong hours, please send the name of the student and any details you recall to info@charityrepublic.com so that we can restore the hours for you.