How do I create a new Signup Code for my class?

1.First, create a Class if you haven’t already.

2. Next, create a class-wide Signup Code for your students before they register accounts. When students enter this code during registration, they automatically get added to your Class.

3.Select the  symbol to add new signup code

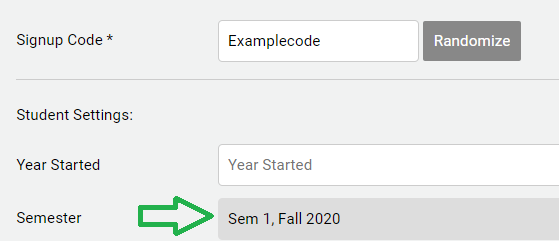
4. Either create your own random code (e.g. Winter2020) or click the Randomize button to create a random code
NOTE: The codes must be at least 5 characters.

4. Select the Semester from the drop down

5. Click Save to finish adding the new code
NOTE: Once saved,  you can view which students are associated with the sign up code by scrolling to the bottom of the page

TIPS
  • Remember to create a Class first! When students register with this sign up code, they automatically get assigned to your Class.
  • You only need to create one sign-up code per class, and multiple students can sign-up using one code.
  • You do not need to create a Signup Code if you are a guidance counselor
  • You can modify your Signup Code at any time by returning to the page of the Signup Code you just created and typing in a new Signup code. Make sure you save your changes once you’re done.

How to Locate Volunteer & Placement Opportunities

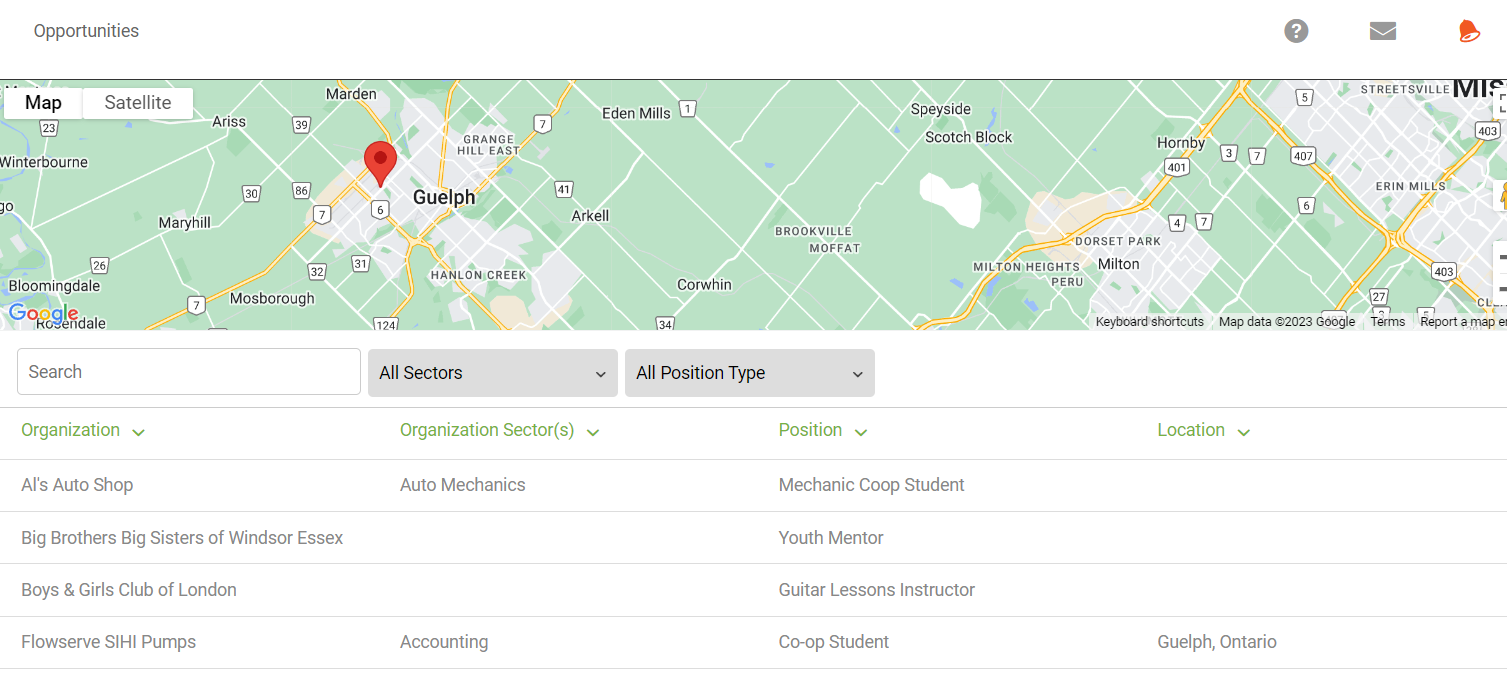
Click on the Opportunities section  in the left panel or,
locate opportunities from your Dashboard.

In the Opportunities section, you can view placement opportunities by Organization, Position, Location, and Sector. If a placement has an address set, then it will appear on the map as well.

Examples of opportunities:

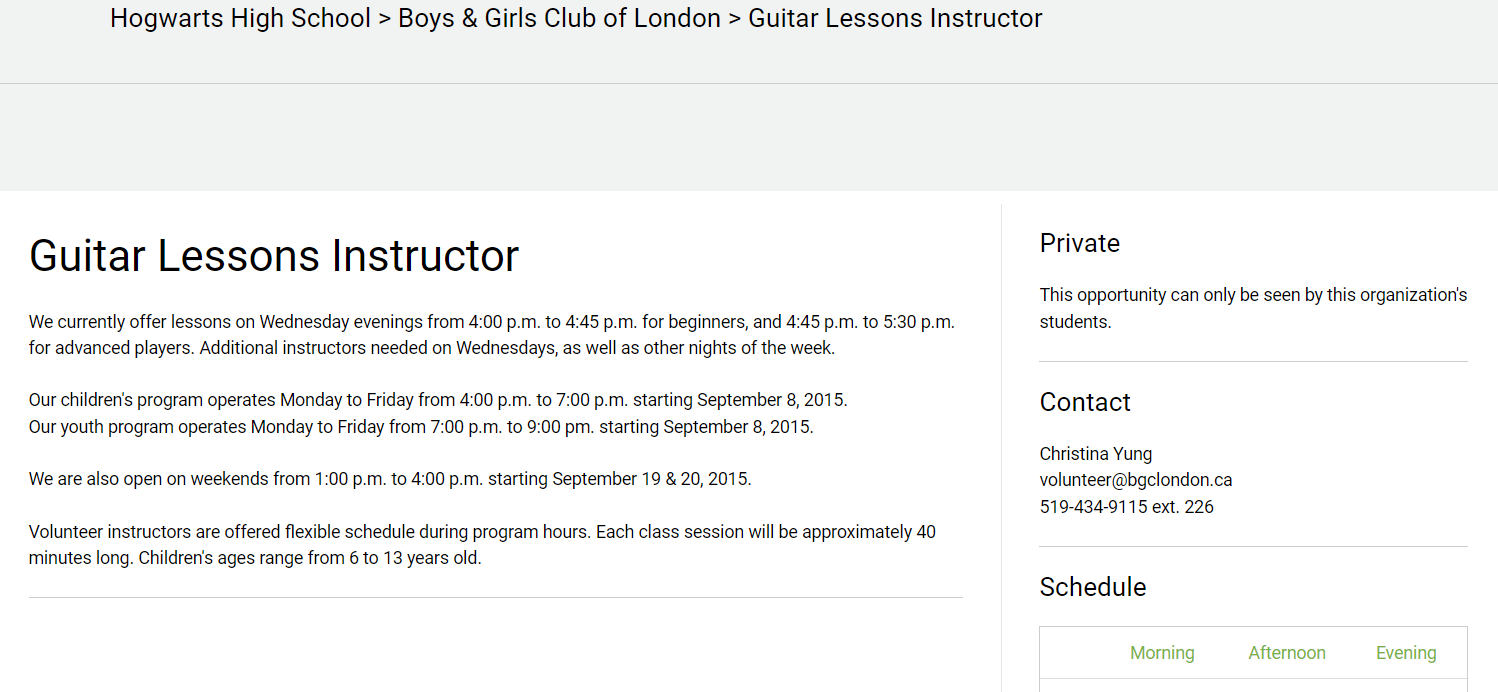
Click on a specific placement to review any details associated with the placement – this includes the placement description, qualifications and contact information.

CLASSES: Create a New Class / Add or Remove Students / Add a Date Range / Add a Sign Up Code

Classes are used by teachers to organize students into groups (e.g. Semester 1 co-op students).

The Signup Code is used to easily attach students to a Class. i.e. when students enter the provided Signup Code into their registration form, they automatically get added to the Class.

e.g. Class name: Semester 1, 2024-2025 [teacher name]
Signup Code: 2024sem1

Creating a Class

#1. To begin creating a new class, select your high school on the left tool bar 

#2. Click the Classes icon 

#3. Select the  in the top right corner to create a new class

#4. Enter a name for your Class, you choose! It’s your way of organizing students:
(e.g. Semester 1, 2024-2025 [teacher name])

#5. Add a date range to your class (e.g. from the first day of a semester to the last day of a semester).  The progress bar will reset to zero for returning students, simply hiding logs from previous semesters.

TIP: Students need to select the Class filter (e.g. Sem 2 2020-21) in the Hour section in order for the date range to take effect.
TIP: Beside Total Submissions in the Hour section, we indicate how many submissions are hidden when the Class filter is selected (e.g. 15 submissions hidden by filter).

#6. You will automatically be added as a teacher/coordinator table when you create a new class.
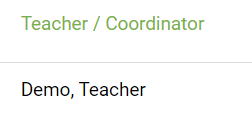
TIP: To remove a teacher from your class code, simply click the "-" symbol beside a teacher's name, and click 
TIP: To add another teacher/coordinator, click the symbol. Use the search bar, or filters to locate teachers/coordinators, then click the check box beside the teacher's/coordinator's name to add them to the class, then Done.

#7. Click  to create this new class

Signup Code

#8. This will cause the sign up code table to pop up and allow you to create sign up code for your class by clicking the  symbol.

NOTE: Providing this code to your class will automatically assign them to it when they register with the code.

#9.  Enter a sign up code (2024sem1) or select the  button to have one created for you:

TIP: Keep your sign up code simple to avoid students from making typos!

#10. To finish, click

Congratulations! Your class is ready to go😀

Adding / Removing a Student from a Class

Students are automatically added to your Class when they register with the Sign Up Code you provided.
NOTE: Students must register an account before they can be added to a Class.

#1. To begin, select your high school on the left tool bar to access the main administrator section

#2. Click the Classes icon 

#3. From the table, click on the class that you would like to add or remove a student from.

#4. To add a student, click the symbol in the second table (with the Student column).
Search the list, or use the search bar, or use the filters to locate student(s). Select a student by clicking the check box beside the student’s name, and Done.

TIP: To remove a student from the class, click the "-" remove icon beside the student's name.

#5. To finish, click 

How Does Guidance Approve Volunteer Hours?

If you would like to quickly locate your students’ unapproved hours, then please follow these steps:

  1.  Locate the sidebar on the left panel, then click on the Students tab.
  2. Set the filters to the following:
    Category > Volunteer
    Status > Verified
    All Hours > Unapproved
  3. Select a student that needs hours approved
  4. Review the students Verified hours and Select Save and Approve
  5. Guidance counselors can also click the check mark  under the Approve/Reviewed column to approve hours
  6. Once the check mark has turned yellow, the hours have been approved

How do I prevent students from adding Employers, Positions, and Contacts for hour tracking?

How to Activate the Feature

1. Click on the Main Administrative tab by clicking on your high school’s name.

2. Click on the Settings tab.

3. There will be an option titled Employer Setting. Check off this box.

4. Select .

How do Students Select Employers?

1. First, teachers will need to add all of the students’ employers. This can be done by following the steps in this FAQ.

2. Now, when students add hours, they can find their employer by typing the first few letters of their employer’s name into the Organization field and selecting that employer.

How do Employers and Parents/Guardians add our Email to a Safe List and Check Their Spam/Junk Folders?

Checking Spam/Junk Folders

When Using Gmail

1. Go to your Gmail account.

2. Along the left side of the page is a list of labels. If you keep scrolling you will reach an option that says More. Click on it to reveal more labels.

3. Once you click More, scroll down until you find the Spam label, click on it.

4. Check the box next to the Hour Verification email, then select Not Spam.

When Using Hotmail/Outlook

1. Go to your Hotmail/Outlook account.

2. Along the left side of the page is a list of labels, click Junk Email.

3. Check the box next to the Hour Verification email, then select Not Junk.

If the email was not there, please follow the steps below to add our email to your safelist and request the student to submit the hour verification.

Adding an our Email to your Safe List

If you cannot locate the hour verification email in your spam/junk folder, then please see the steps below regarding how to add our email to a Safe List in Gmail and Hotmail/Outlook.

When using Gmail

#1. Click on the gear icon in the top-right corner. Once the menu pops up, select See all settings

#2. Go to the Filters and Blocked Addresses tab and click Create a new filter

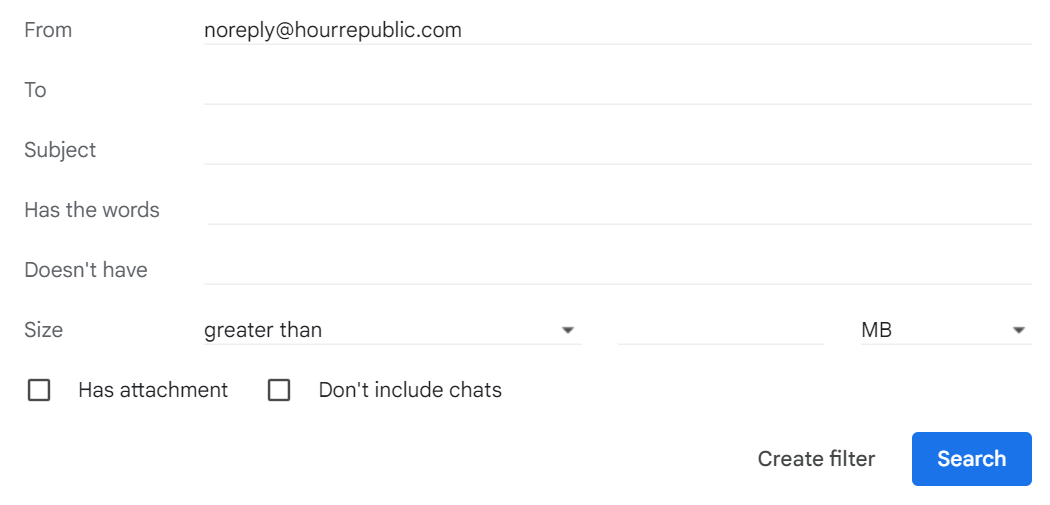
#3. Enter noreply@hourrepublic.com into the From field then click Create Filter

#4. A menu will pop-up, select Never Send it to Spam then click Create Filter

5. If the email was being blocked, request that the student resends the hour verification email to you.

When using Hotmail / Outlook

#1. Click on the gear icon in the top-right corner and then click View all Outlook settings

#2. Click on the Junk email tab then scroll down to the Safe senders and Domains section to select Add

#3. Type in noreply@hourrepublic.com, press the enter key, and then Save your changes

4. If the email was being blocked, request that the student resends the hour verification email to you.

Alternative: Teachers/Coordinators can share a direct link to an hour log with an Organization/Employer or Parent/Guardian
Teachers can share a direct link with an Organization/Employer (or with Parents/Guardians specifically as it relates to volunteer hours) to verify  hours. Simply click on the "Copy hour verification link" and paste that link into any message. That will take an employer directly to an hour summary web page where they can verify hours. This is a helpful alternative when employers have not received an hour submission via email. Or, when you need someone else to verify an hour log (e.g. supervisor who is covering off for a colleague).

How do Teachers/Coordinators Create an Achievement?

Teachers/Coordinators can create an achievement by following these steps:

1. Locate the sidebar on the left panel, then click on the Students tab.

2. Click on any student.

3. Next, select the  icon located at the center of the screen.

4. Click on the icon at the top right of the screen to add a new achievement.

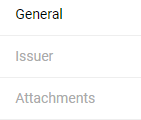
5. Fill in all the necessary fields for the achievement. You can fill in additional fields such as the issuer and add an attachment by selecting the appropriate tab on the sidebar.

6. Once you have filled in all the information, click .

TIPS

1. You can delete unwanted achievements by clicking on them while on the Achievement page then selecting the  button.

2. Teachers/coordinators can add achievements in bulk. For more information regarding this feature, please click here

Why can’t I see students in my Students section?

Possible Reasons:

(i) The type of filters being selected in the Students section.

(ii) Student(s) registered for the wrong school.

(iii) A Signup code was not set up for the Class.

(iv) Student(s) did not enter the correct Signup Code during registration.

(v) Students have not yet registered.

Method 1 – Set Students Section Filters to All

The most common reason for not seeing students –> the wrong filters being selected in the Students section.

If you are unable to locate your students, click on the  tab and:

(i) Please ensure that your filters are set to the “All” default for all filters

(ii) If you are using the Classes section, then select your Class from the drop-down

Most filters should be set to All except the Class filter (see filter underlined in green). This filter should be set to your current class so that you will only see your students.

TIP:

The most common filter behind this issue is the Semester filter. Only students who register using a sign-up code with a specified semester will automatically be set to a semester.

If a student did not register using a sign-up code, then their semester filter will be left blank and they will be filtered out if the Semester filter is not set to All Semester

Method 2 – Check your Class

If the students continue to not show up, it is possible that they are not linked to your class. Set your Class filter to All Classes

If they show up, then that means the students are not linked to your class. There are a couple of reasons why this could happen:

(i) The students did not enter or misspelled the sign-up code when registering

(ii) There is no sign-up code associated with the class

(iii) The student did not register for the correct school

NOTE: If you have any questions about setting up and/or reviewing your sign-up code, please see this FAQ

In order to link the students to your class, please follow these steps:

1. Click on the tab with your school’s name
2. Select the Classes tab
3. Click on your Class name
4. Scroll down to the Student table and click the icon found at the right corner of the table
5. Once you click on this, a pop up menu will open. Type the first name or last name of the desired student into the search bar then make sure to click Enter.
6. If their name appears, check the box next to their name then click 
NOTE: If the student’s name does not appear, then make sure the Status filter is set to All Statuses
7. Repeat this process until all of your students have been added
8. Click  to save any changes

A Student is Missing from my Class (Hour Tracking)

If you are having trouble locating a student, then below are some possible reasons:

A) The student has not registered an account to track hours

You can check if a student has registered by following these steps:

1. Click on the  tab
2. Set all the filters to All
3. Type in the first or last name of the student that is missing in the Search bar
4. If the student does not appear, then that means that the student has not registered an account yet.
5. Reach out to the student and send them the Signup Code for your class so that they can register. If they are having trouble registering, then please share this guide.

B) Your student has not been added to your Class

1. Click on the tab with your school’s name
2. Select the Classes tab
3. Click on your Class name
4. Scroll down to the Student table and click the icon found at the right corner of the table
5. Once you click on this, a pop up menu will open. Type the first name or last name of the desired student into the search bar then make sure to click Enter.
6. If their name appears, check the box next to their name then click 
NOTE: If the student’s name does not appear, then make sure the Status filter is set to All Statuses
7. Once you have added the student, make sure to click  to save any changes

C) Your student’s status is set to inactive

1. Click on the  tab

2. Set the Status filter to All Statuses

3. Type the name of the desired student into the search bar

4. If the student’s name pops up, click on it and this will take you to their hour dashboard

5. Once you are on their dashboard, click theicon found around the centre of the screen. This will take you to the student’s General tab

6. Scroll down until you find the Status field and set it to Active

7. Make sure to click  to save any changes

D) Your student is linked to the wrong school

If you your student is linked to the incorrect school, then please email us at info@charityrepublic.com. Within your email please include:

1. The student’s name

2. The school you would like us to transfer the student to