How do teachers/coordinators customize the Achievements drop-down?

By default, Hour Republic comes with several achievement types including: Parent/Guardian Consent Forms, Background Checks, WHMIS, and WEA Forms. However, if you would like to add more achievement types, there are 2 ways that teachers/coordinators can do this:

Method A

1. Locate the sidebar on the left panel, then click on the tab with your school’s name (this is the Admin section).

2. Select the tab on the left that says Achievements.

3. Once you’re in the Achievements section, click on the  button.

4. Type in the desired achievement in the Achievement field (e.g. WHMIS).

5. Once you’ve typed it in, click .

Method B

1. Locate the sidebar on the left panel, then click on the Students tab.

2. Click on any student.

3. Next, select the  icon located at the center of the screen.

4. Select thein the top right corner.

5. Click on the text that says . This will take you to the Achievements page.

6. click on the  button.

7. Type in the desired achievement in the Achievement field.

8. Once you’ve typed it in, click .

TIPS

1. If there is an achievement you’d like to remove, select the  button next to it.

2. For more information on how teachers/coordinators and students can create achievements, please click here

Student Types

Student types let you indicate whether a student is in a Co-op, SHSM, or Dual Credit program and can be useful when running reports. Follow this guide to learn how you can create and set student types.

Q. How do teachers/coordinators create new Student Types to be added to the drop-down?

Method A:

1. Locate the sidebar on the left panel, then click on the tab with your school’s name.

2. Select the tab on the left that says Student Type.

3. Once you’re on the Student Type page, click on the  button.

4. Type in the desired Student Type in the Student Type field.

5. Once you’ve typed it in, click .

Method B:

1. Locate the sidebar on the left panel, then click on the Students tab.

2. Click on any student’s name.

3. Once you’re on the student’s profile, click on the  icon.

4. Select the tab on the left that says Demographics.

5. Click on the text that says . This will take you to the Student Type page.

6. Select on the  button.

7. Type in the desired student type in the Student Type field.

8. Once you’ve typed it in, click .

TIP

If there is a student type you’d like to remove, select the  button next to it.

Q. How do I Change Student Types?

1. Go to the desired student’s profile.

2. Select the tab on the left that says Demographics.

3. Select the drop-down menu for the  field.

4. Choose the appropriate student type.

5. Once you’re finished, click .

How do I Create a PDF Version of Reports?

You can create a PDF version of reports by following these steps:

1. Click on the  tab on the left sidebar.

2. Select the desired report. Once you apply all the filters, click .

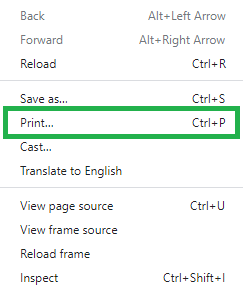
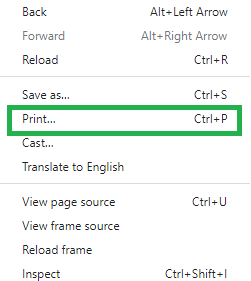
3. You will be taken to a web version of the report, right-click anywhere on the page to open up a menu. Select the Print… option.

4. Once you click Print… a pop up menu will appear. Set the Destination to Save as PDF.

4. Select the  button at the bottom of the page.

5. Save the file to a location on your device.

Published and Public Positions/Opportunities

What is a position?

For work placements, this is the position of the student at placement (e.g. Automotive Assistant).

For community service, these positions represent volunteer opportunities (e.g. Food Bank Sorter).

Access the Positions / Opportunities section

1. Click  on the left toolbar

2. Search and select the desired organization, then click on the Positions icon

3. Select an existing position (e.g. Food Bank Clerk)
At the bottom of the General tab for a position, you will see the Published and Public fields.

NOTE: If you’re looking to create a new position/opportunity, then please reference our FAQ here.

When both PUBLISHED and PUBLIC check boxes are not checked
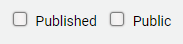
By default, all positions are private (i.e. only visible to a teacher/coordinator) since neither the Published nor Public boxes are checked.

When both the Published and Public boxes are unchecked, the position/opportunity cannot be viewed by students under any circumstance. This is essentially a draft version of the position/opportunity and can only be accessed by teachers/coordinators.

NOTE: Publication Dates (i.e. when a position/opportunity is visible) do not work unless either the Published or Public boxes are checked (see below).

When only PUBLISHED is checked

When only the Published box is checked, only students from your school are able to view the position/opportunity on their Opportunities page. This is ideal if the position/opportunity is exclusive to your school.

If the Publication Date (i.e. when a position is visible) is expired or has yet to be published, this position/opportunity will no longer be available to the students at your school and will not show up on students’ Opportunities page.

When only PUBLIC is checked
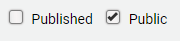
When only the Public box is checked, the position/opportunity is viewable to anybody with a link to it. However, it is otherwise inaccessible to anybody except teachers/coordinators and will not show up on students’ Opportunities page. The link can be found under the position/opportunity’s title in the Preview and on the page advertising it.

NOTE: Publication Dates (i.e. when a position is visible) do not apply or work for this type of position/opportunity.
When both PUBLISHED and PUBLIC are checked
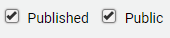
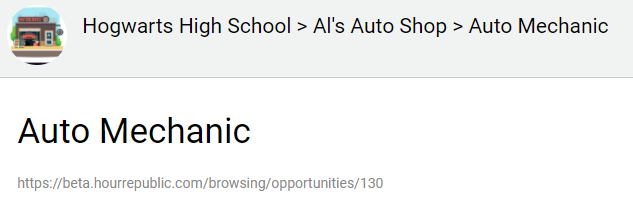
When both the Published and Public boxes are checked, the position/opportunity is accessible to everybody. The position/opportunity will show up on students’ Opportunities page. It will also have a shareable link that you can send to students inside and outside of the school.

NOTE: If the Publication Date (i.e. when a position is visible) is expired or has yet to be published, this position/opportunity will no longer be available to anybody without the web link. This means that it will not show up on students’ Opportunities page anymore.

TIPS

1. Public events can be shared on social media through Facebook, Instagram, and Twitter:
2. If you leave the Publication Date blank, the position/opportunity will be advertised indefinitely.

3. For more details on how to create a position/opportunity, please click here.

How do I Create a PDF Version of the Calendar?

You can create a PDF of your calendar by following these steps:

1. Click on the  tab on the left sidebar.

2. Right click anywhere on the calendar and a menu should pop up. Select the Print… option.

3. A pop-up menu will appear, set the Destination to Save as PDF.

4. Select the  button at the bottom of the page.

5. Save the file to a location on your device.

TIP:

You can change the format of the calendar by clicking on the  buttons to set it to a daily, weekly, or monthly calendar.

How does a Student Add More than One Shift?

If a student has multiple shifts in one day, here is how they can add those shifts to their weekly log:

1.While adding hours in a Weekly format, click on the  icon twice next to the desired day (e.g. Monday).

2. An additional shift should appear. You can keep adding more shifts by clicking the icon.

3. If you have accidentally added a shift, you can select the  icon next to the desired shift to remove it.

Note:

This guide only applies to the Weekly Hour Type


What if a Student has Two Employers/Supervisors?

If a student has multiple employers/supervisors, they can switch between them while recording their hours by following these steps:

1. Go to the  tab on the left sidebar.

2. Click on thebutton in the top right.

3. In the Organization field, start typing the name of the organization you are placed with and that organization’s name should pop up. Click on it.

Note:

If you have yet to add your organization, click on the  icon to add a new organization.

4. The Contact drop-down menu should now appear underneath the Organization field. This will allow you to choose between employers/supervisors.

5. If you need to add an employer/supervisor, click on the  next to the Contact drop-down menu and fill in all of the necessary information.


Exporting summary and weekly reports of hours

How do students print one hour log?

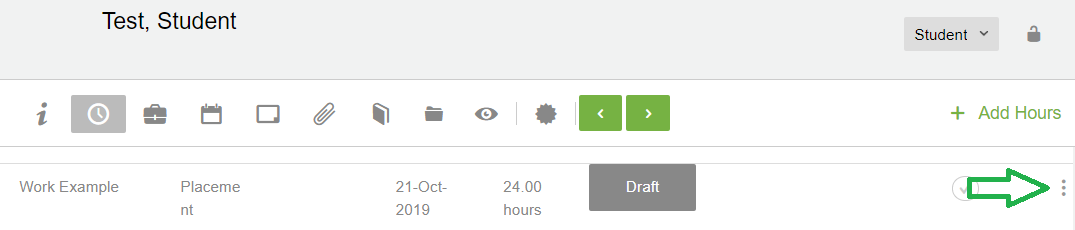
In the Hours section, students can export one entry of their hours by clicking at the right side of the desired hours. Select Export to create a PDF summary of hours and print.
 

How do students print a summary of all of their hours?

In the Hours section, students can export a summary report of their hours by clicking the Export iconbelow their progress bar.


Pre-Placement Activities for Students

A. Career Interests

Students can specify their career interests by following these steps:

1. Click on the tab to Edit your Student Profile (left-panel) or click on beside the hour tracking icon under your student profile

2. Click on the tab called Career Interests (left-side of student profile)

3. You can scroll through the Career Interests page and click on items that interest you. These interests will appear at the top of the Career Interests section after you click on them.

4. If you have additional interests that are not listed, then you can type them into the Other Interests field and click enter.

5. Once you’ve added all your interests, click thebutton.

NOTE:

1. Teachers/Coordinators can run a report on student’s career interests by clicking on the Reports tab.

2. Once on the Reports page, scroll down until the Interests report is located.

3. Click the report, set up the filters, then select Generate Report.

A. Availability

Students can add the times that they are available and unavailable by following these steps:

1. Click on the tab to Edit your Student Profile.

2. Among the series of icons along the top, click on the Availabilityicon.

3. Select thein the top right corner.

4. Once on the Availability page, fill in the Date Range and specify whether you are available or unavailable during this time.

5. You can also click the Timeslots tab on the left to specify which times you’re available during the week.

6. Once finished, click the  button.

NOTE:

1. Teachers/Coordinators can run a report on student availability by clicking on the Reports tab.

2. Once on the Reports page, scroll down until the Availability report is located.

A. Employers

Students can add organizations following these steps:

1. Click on the Hours tab.

2. Selectin the top right corner.

3. Click the next to the Organization field or, search the Organization field (the employer may have already been added by a teacher/coordinator or previous student).

4. Fill in all the necessary fields for your employer.

5. Once you filled in the necessary information, click on  in the top right corner.